
Introduction
Are you tired of those unsightly wire dog crates taking up space in your home? In this step-by-step guide, inspired by a video from Family Handyman, we’ll show you how to create a stylish and functional DIY dog crate that not only serves as a comfortable home for your furry friend but also adds a touch of elegance to your living space.
Materials You’ll Need:
- Three-quarter inch plywood
- Copper pipes
- Wood glue
- Screws
- Miter saw
- Steel wool
- Soft blow hammer
- Tape measure
- Five-minute epoxy
- Four-inch hairpin legs
- India ink
- Peel-and-stick wallpaper
- Figure-eight shaped desktop fasteners
- Edge banding
- Finish coat
Step 1: Determine Crate Size
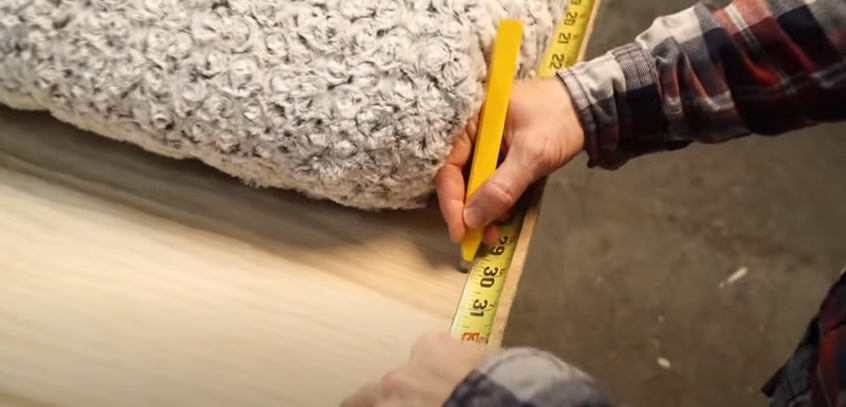
Measure the length and height of your dog, adding four inches to each dimension.
Consider the size of the dog bed your dog prefers.
Use the bed dimensions to size your dog crate.
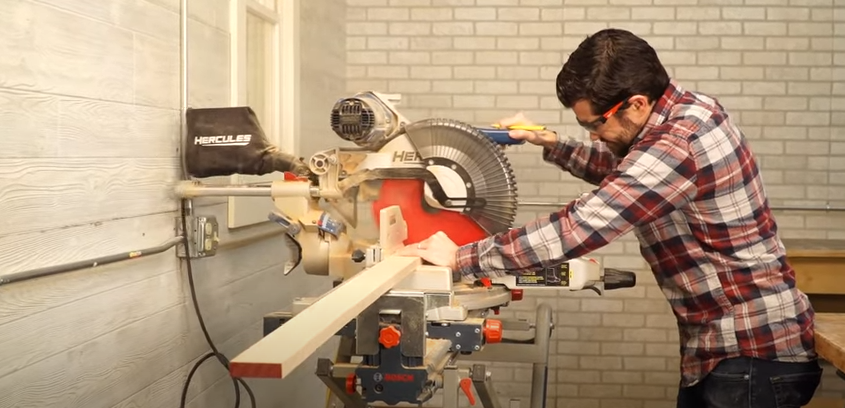
Step 2: Cut and Assemble Bottom and Sides
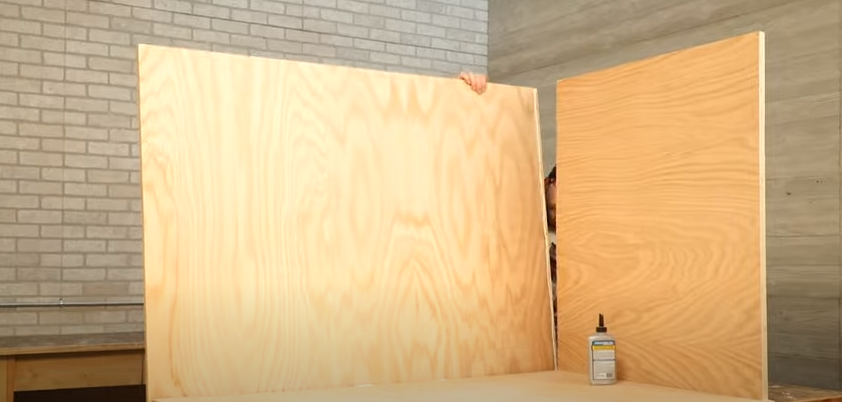
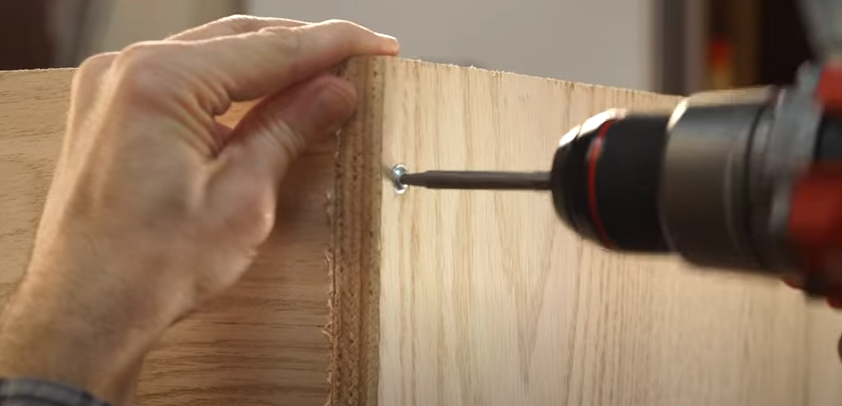
Cut out the bottom, side, and back pieces from three-quarter inch plywood.
Attach the side and back pieces to the bottom using wood glue and screws.
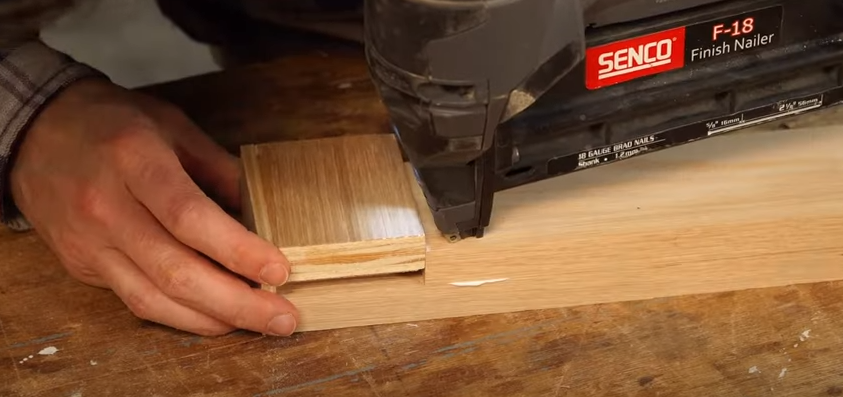
Step 3: Create Face Frame Panels
Measure and cut inner and outer styles for the side and front face frame panels.
Ensure the styles are the same size by stacking and cutting them using a miter saw.
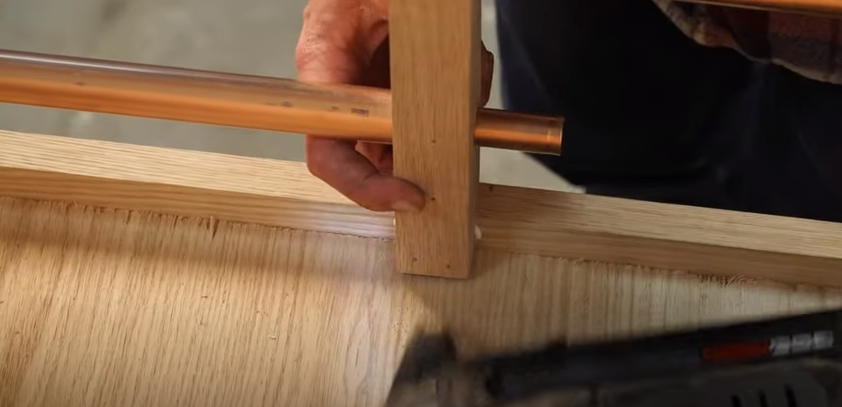
Glue the styles flush on the edges and use a two-and-a-half-inch wide spacer on the top side to position them.
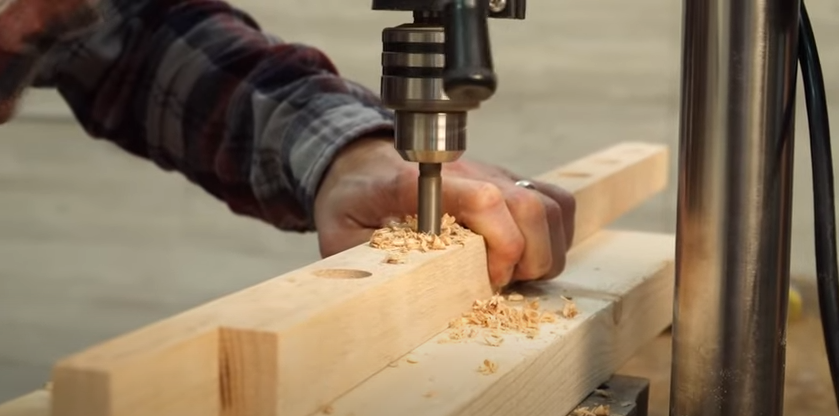
Make marks every four inches on the inside of the styles and drill three-quarter inch diameter holes at the marks.

Polish the copper pipes with steel wool for a clean look.

Step 4: Assemble Side Panels
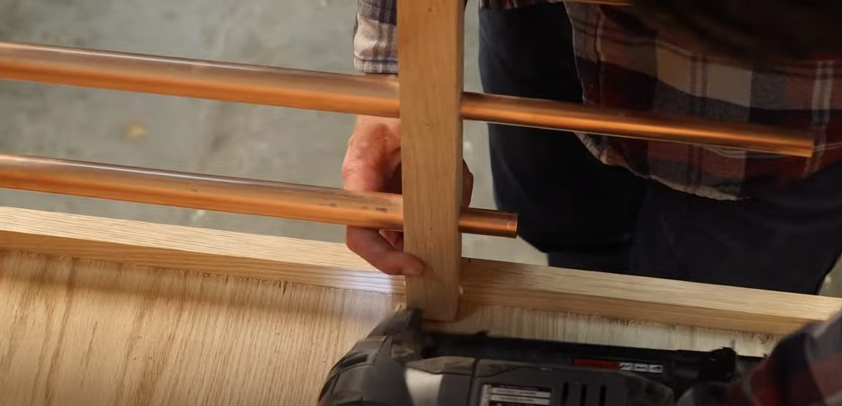
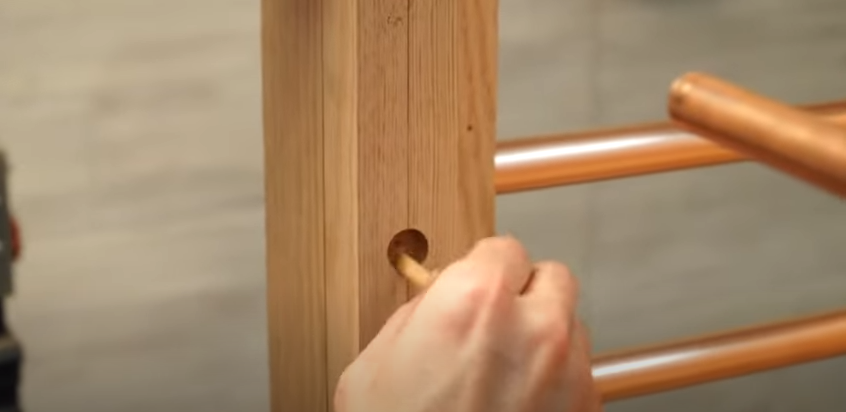
Insert the copper pipes into the drilled holes on the side panels.
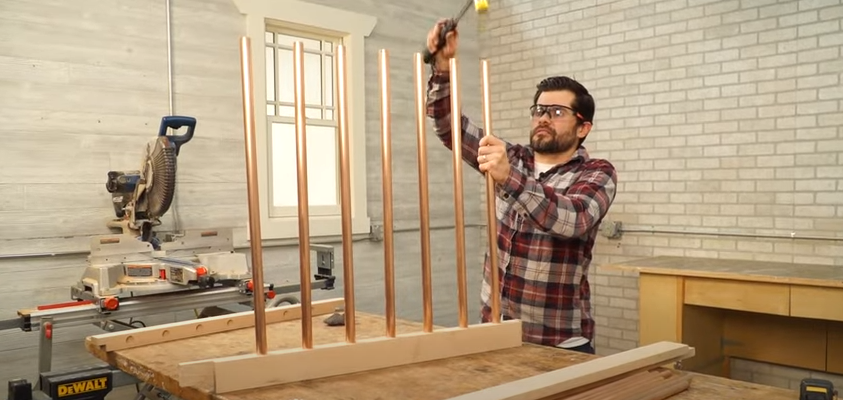
Secure the rails to hold everything together, ensuring they are flush with the outside of the styles.
Check for squareness.
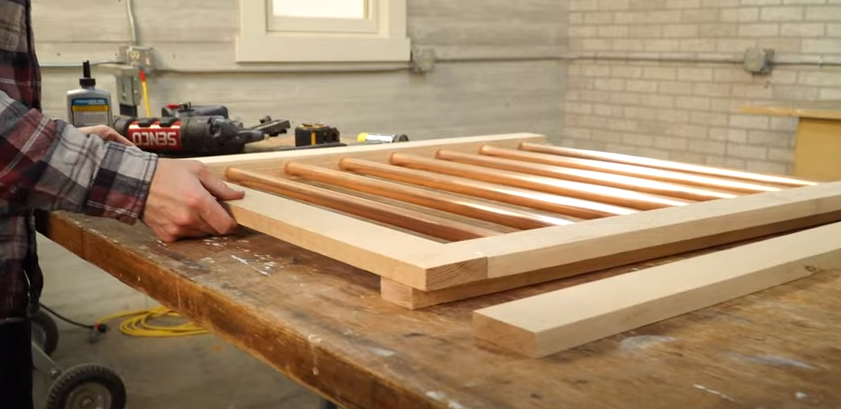
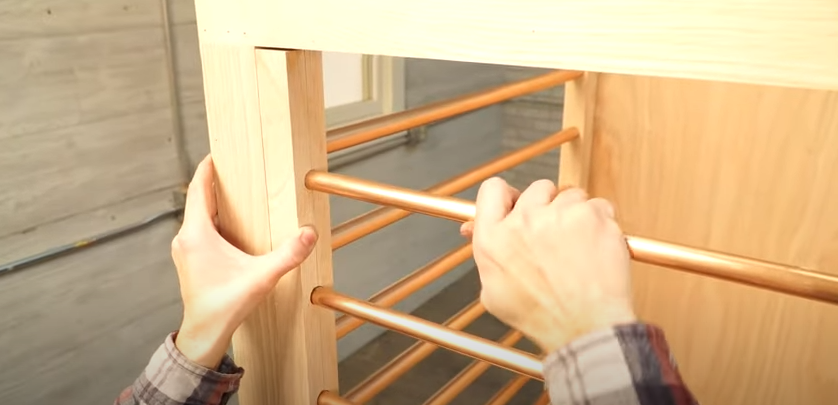
Step 5: Build the Front Face Frame
Follow the same process as the side panels but leave out the pipes to install later.
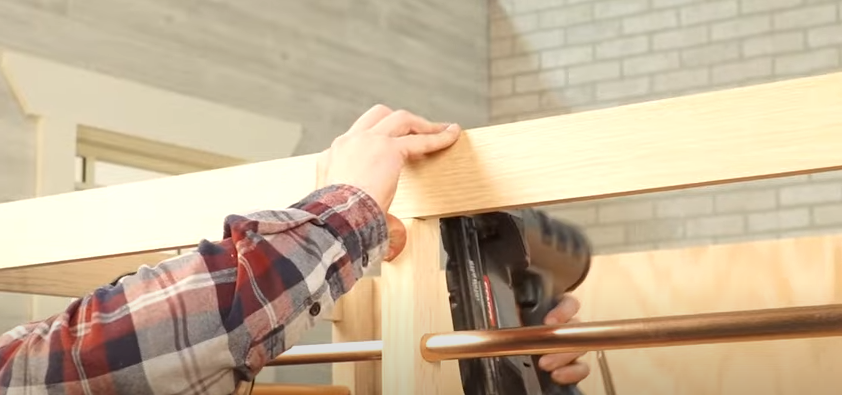
Attach the front face frame panels to the side and front, ensuring corners line up.
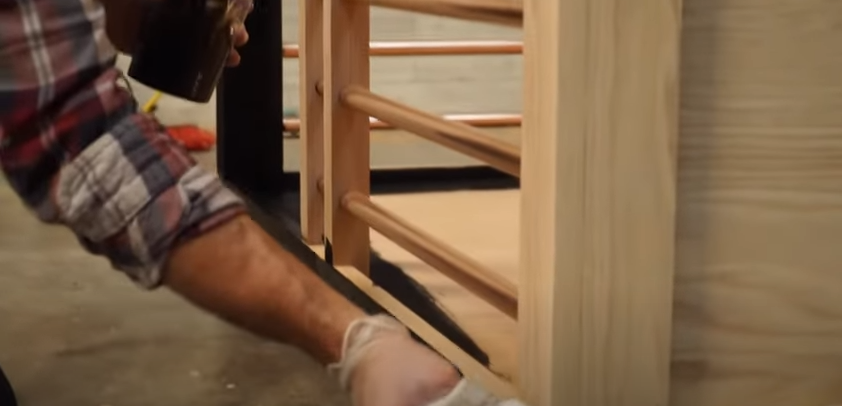
Step 6: Create Centre Styles
Make two centre styles in the same way as corner styles.
Drill three-quarter inch holes as before, but also drill a half-inch hole through one style for the door’s telescoping mechanism.
Attach the fixed centre style to the front face frame.
Step 7: Prepare Door
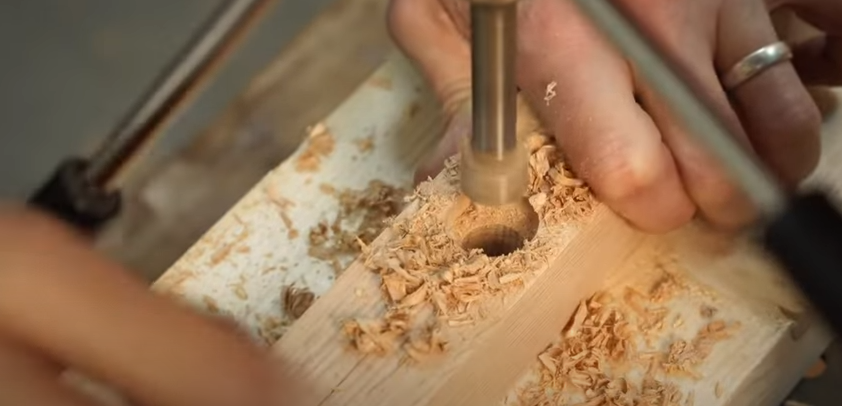
Drill half-inch holes four inches apart into the door style.
Use five-minute epoxy to attach half-inch pipes into the door style when it’s in the closed position.
Step 8: Add Legs and Finish
Attach four-inch hairpin legs to each corner of the crate.

Use India ink to dye the crate black.
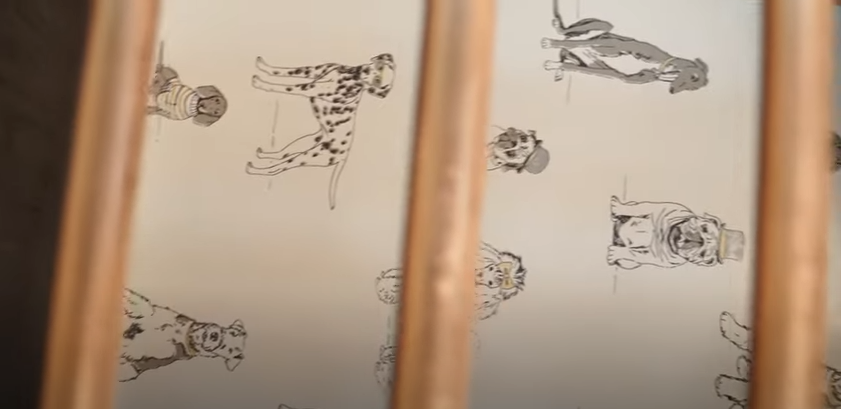
Apply peel-and-stick wallpaper to the inside plywood walls.
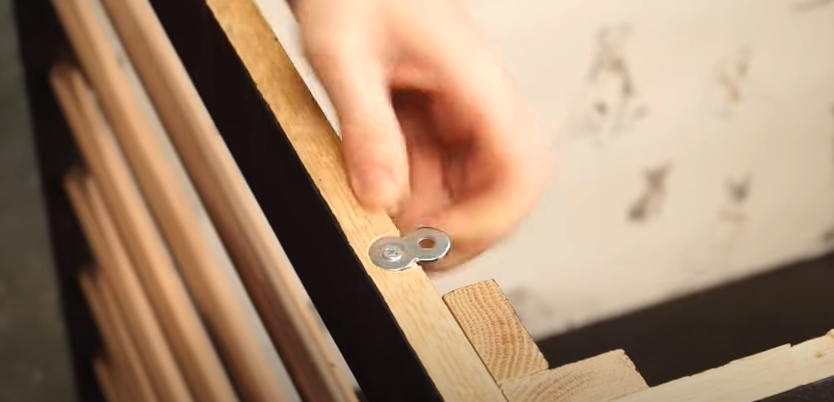
For the top, use figure-eight shaped desktop fasteners to secure it.
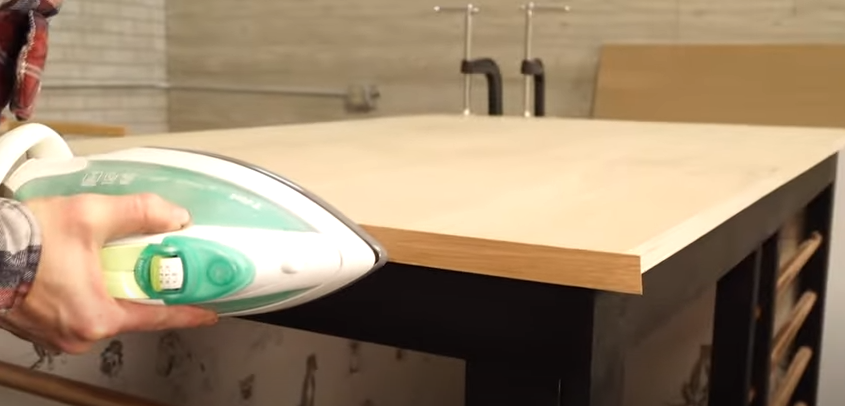
Trim edges and apply edge banding.
Finish with a coat of your chosen finish.
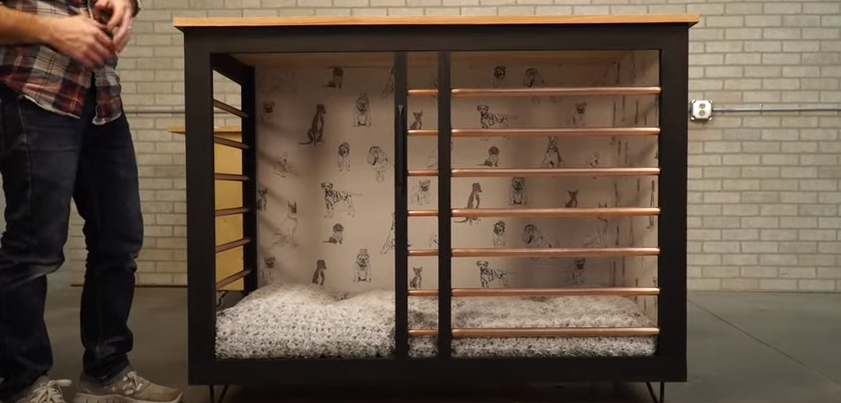
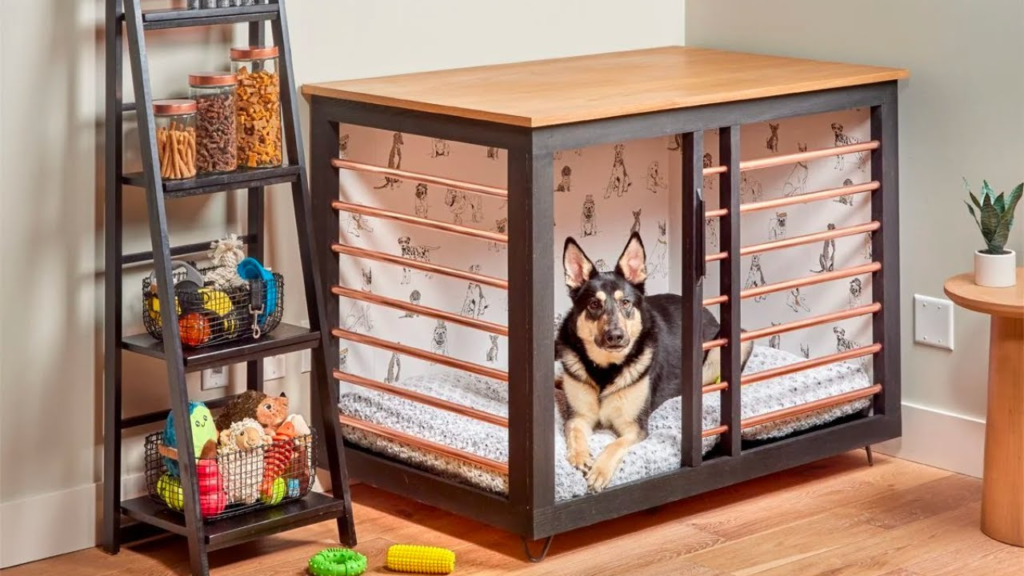
There you have it – a stylish and practical DIY dog crate with telescoping copper tube doors and a comfortable bed inside. Your furry friend will love it, and it will become a stylish addition to your home decor.
For more exciting DIY projects, visit Family Handyman at familyhandyman.com.
If you found this post helpful, please share it with your friends and family on social media. It helps me keep the light on here at the doghows.org
Watch The Video: How to build a DIY Dog Crete
Conclusion
In conclusion, our step-by-step guide on creating a DIY Dog Crate with Telescoping Copper Tube Doors and a cozy DIY Dog Bed is a game-changer for pet owners and DIY enthusiasts alike. This innovative project offers the perfect solution to those unsightly wire crates that clutter your space, transforming your dog’s living quarters into a stylish and comfortable sanctuary.
By following our comprehensive guide, you’ll not only craft a custom-sized DIY Dog Crate tailored to your furry friend’s needs but also provide them with a dedicated Dog DIY Bed, ensuring their utmost comfort and relaxation. The use of copper pipes for the crate’s telescoping doors adds a touch of elegance to your home, making it a conversation piece and a functional piece of furniture.
This project showcases the perfect blend of practicality and aesthetics, making it a must-try for any dog owner looking to enhance their pet’s living space while maintaining a sleek and modern home decor. Whether you’re a seasoned DIY enthusiast or just starting your DIY journey, our guide simplifies the process, ensuring a successful outcome.
Invest your time and creativity into this DIY Dog Crate and DIY Dog Bed project, and both you and your beloved pet will reap the rewards of a harmonious living environment. Transform your space and pamper your furry companion with this ingenious Dog DIY Bed solution. Say goodbye to wire crates and hello to style and comfort!